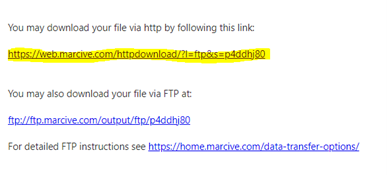
Each month we receive an email outlining that we have available MARC Records from MARCIVE. Here’s what that email looks like:
When we receive that email, we can obtain our MARC records by clicking on this highlighted link (note: the link changes EACH month, you will click on the link below the text stating “You may download your file via http by following this link.”)
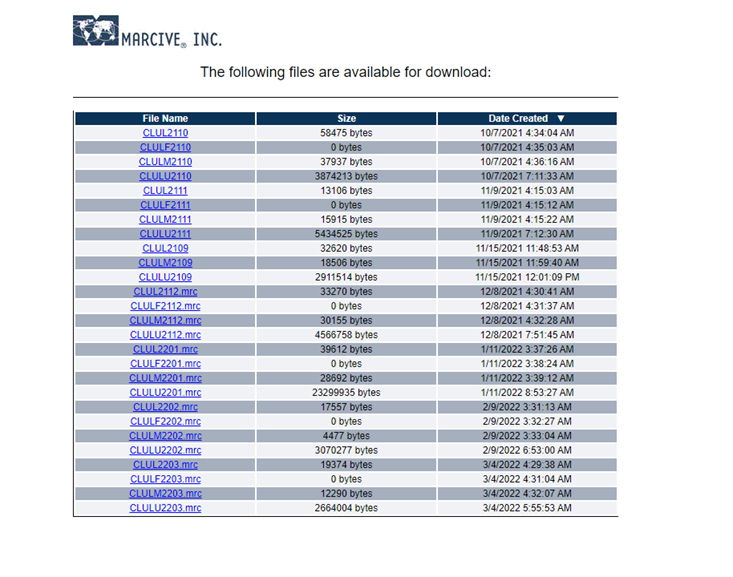
Once you click on this link, you’re sent to a directory of the files available for our CLUL:
Decide which file you need to download, please click on that link. When you click on that link, it will automatically download to your computer. You will see it on the bottom of your screen:
Once you have downloaded the file to your computer, you are ready to import it to Alma.
Alma Import Steps
In Alma, navigate to Resources (highlighted below…note: your bar might not have all these areas).
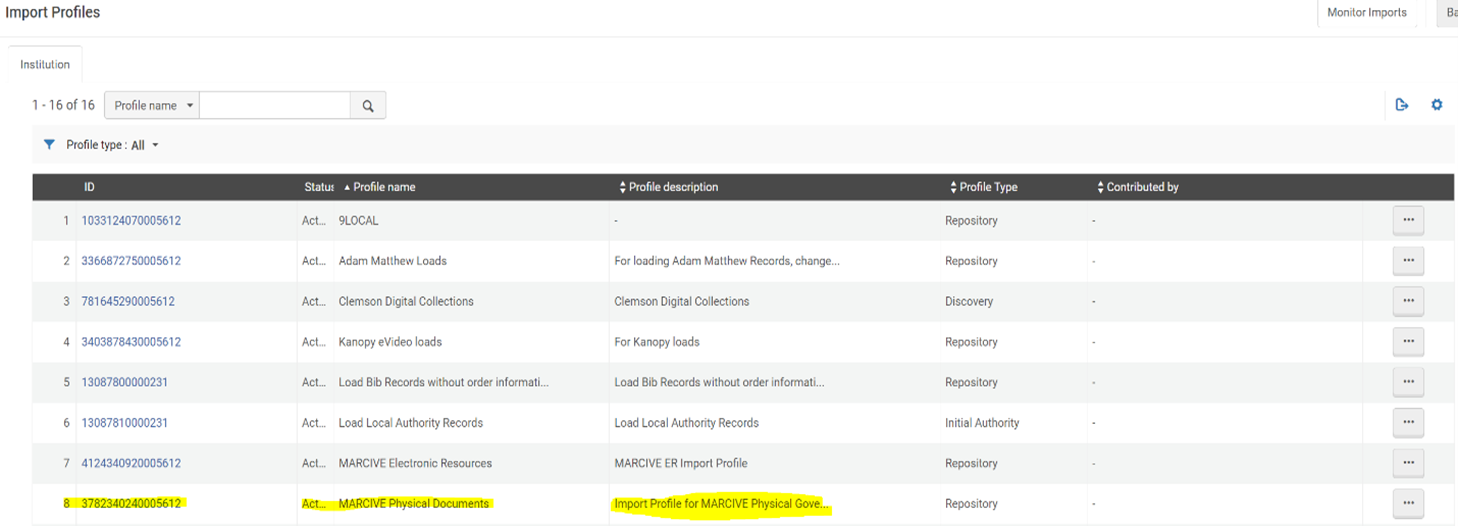
After you click on Resources, you will click on Import (unable to capture screenshot because the menu bar floats). After you click on Import, you’re taken to a listing of various Import Profiles in our Institution Zone. Here’s what that looks like (I have highlighted the Import Profile you’re going to use):
Once you navigate to the correct Import Profile (at this time, it is listed at number 8,) the MARCIVE Physical Documents Import Profile, you will click the ellipses, and then click Run:
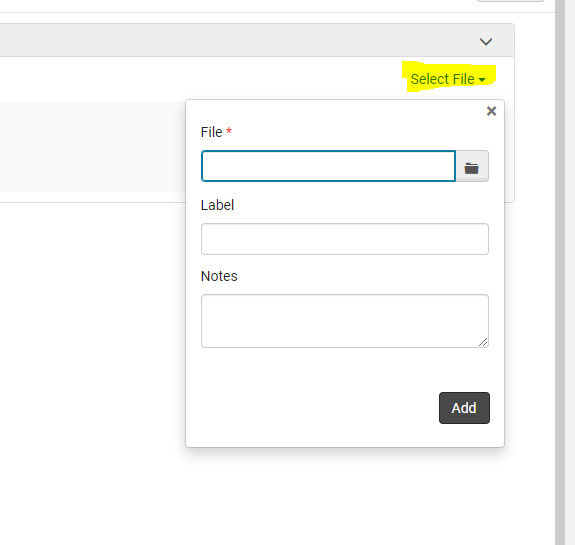
Upon clicking Run, you’re taken to a somewhat blank screen where you click on “Select File.”
After you click Select File, you will click on the file icon in the File field. When you click on this, you can navigate to the file you’ve previously downloaded from MARCIVE (search in your downloads, as below):
When you find the correct file, click on that file and it will automatically populate the File area. You can Label it/put notes in if you would like, but you don’t have to do those steps.
Here’s what you will see once you’ve navigated to the correct file:
Please click on the Add button in the lower right-hand corner.
Don’t be alarmed if you upload a file and it takes a long time to upload (acts like it is “thinking”). It can do this if the file is large and needs to split:
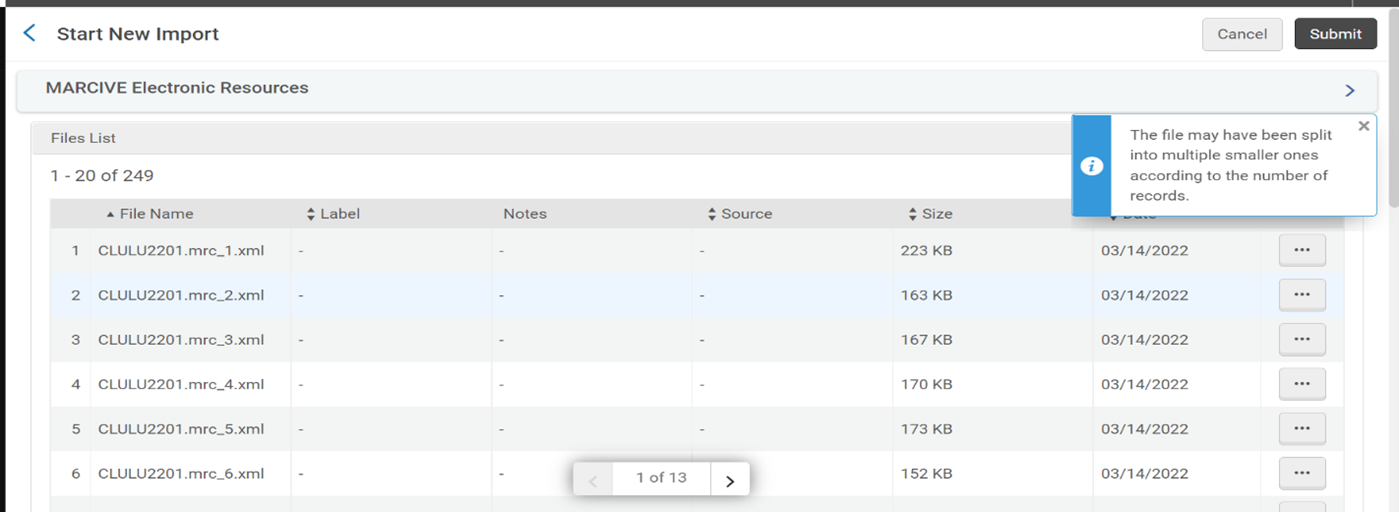
Here’s what that looks like:
NOTE: The Electronic Resources file I uploaded split into 249 smaller files.
Once you get to the screen where the file is uploaded, you will need to click “Submit” in the upper right-hand corner.
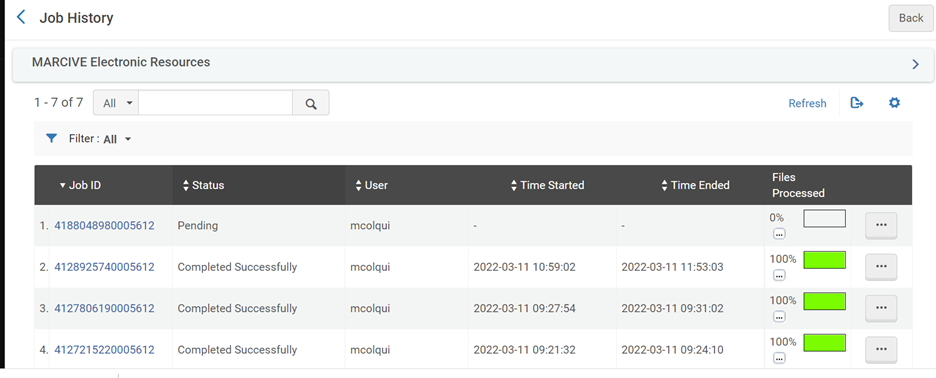
Uploading this file triggers a job in Alma. Here’s the that you’re redirected to:
This screenshot shows that one job is pending, and it also provides information about the history of files I’ve uploaded.
Depending on the file size, this could either take a ling time (Hours) or a short period of time (Seconds). You will receive an email when this process is completed. Here’s that looks like:
You can find out a wealth of important information from this email. For example, this lets you know that 32 records were processed (meaning that it broke the larger file down into 32 easier to deal with files.) It also lets you know how long that this took, 4 minutes and 5 seconds.
Physical Document Processing
Once these physical document records are pulled into Alma, you will need to complete processing.
You will need to go into the bibliographic record and add holding(s) for where you want your item(s) to go.
If you are unsure about how to add holdings and items, please reach out to the Continuing Resources and Government Information Management Librarian for assistance.
Procedure Created by
Michelle Colquitt – 3/17/22
Added to Staffweb by AcS


