The process for requesting loans and the process for requesting articles differ slightly. To begin processing, open the queue, and the open the first request. Processing according to the following loan and article instructions.
Loans
- Search the loan title in the library catalog.
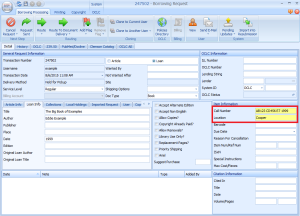
- If we own the item in a location other than Hunter, input the call number and location into the appropriate item information fields.
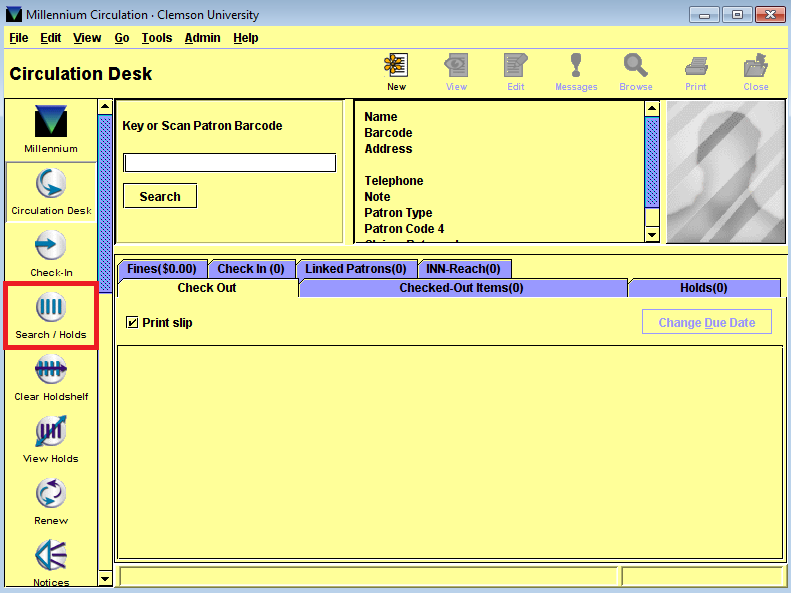
- Open Millennium.
- In the left sidebar, click the “Search/Holds” button.

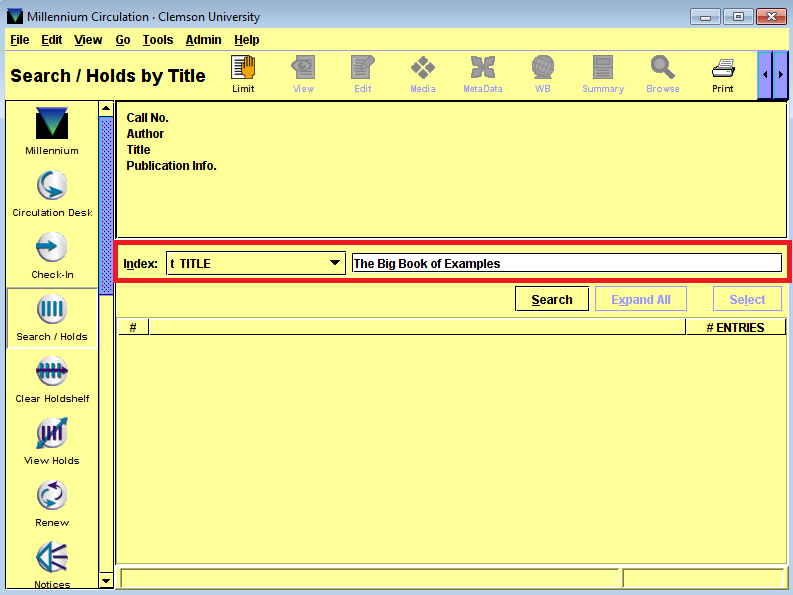
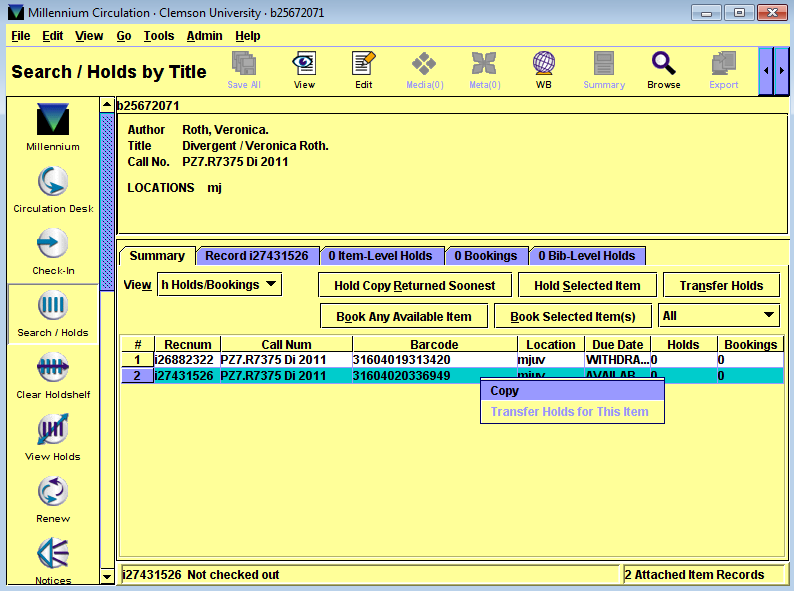
- Search for the item (by title or call number, whichever you prefer).

- Locate the correct item, the right click the bar code field and copy the bar code.
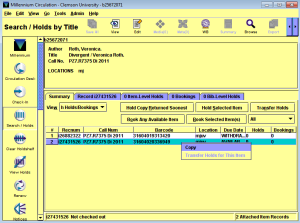
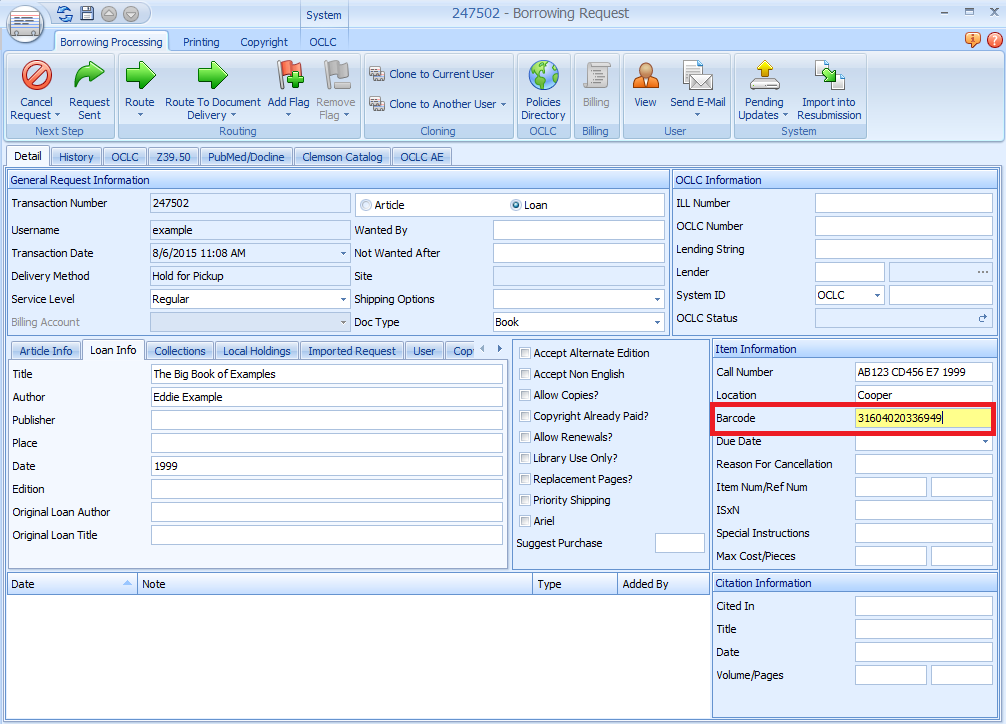
- In ILLiad, paste the bar code into the bar code field.

- Save your changes.
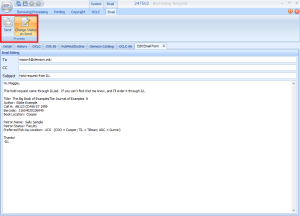
- Click the “Send E-mail” button, and select “Cooper Holds” to email the hold request to Maggie Mason Smith.
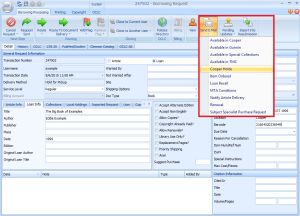
- When the email form opens, be sure the “Change Status on Send” button is turned on. Then click the “Send”button.
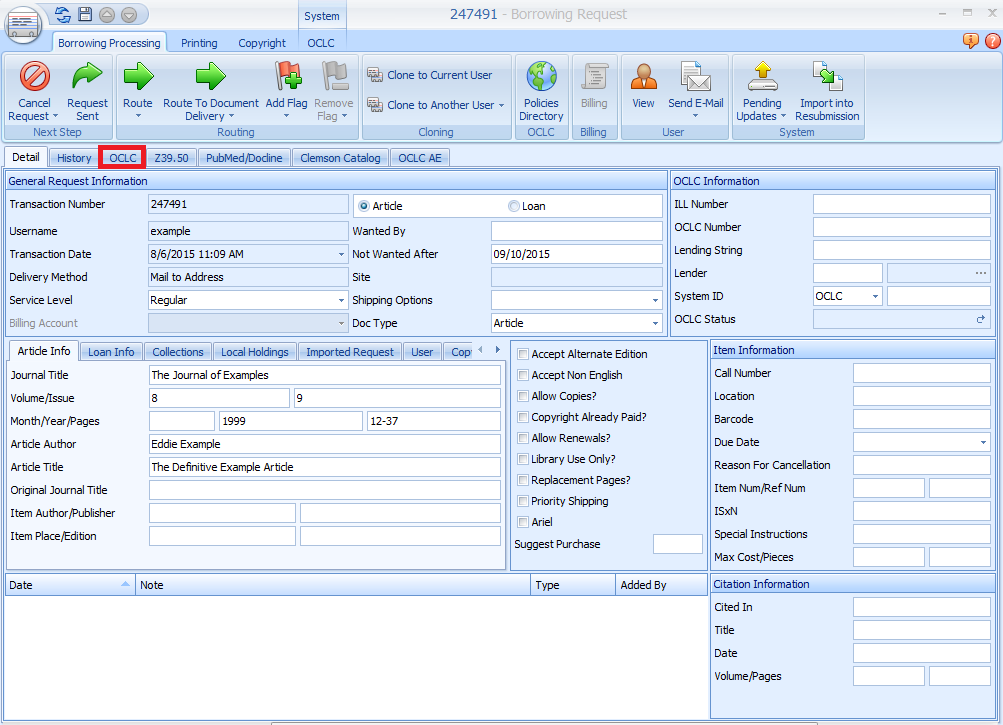
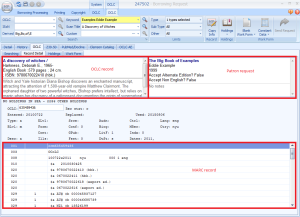
- If we do not own the item, click to open the OCLC tab.

- Search for the item in OCLC. If you get stuck see OCLC Search Tips.
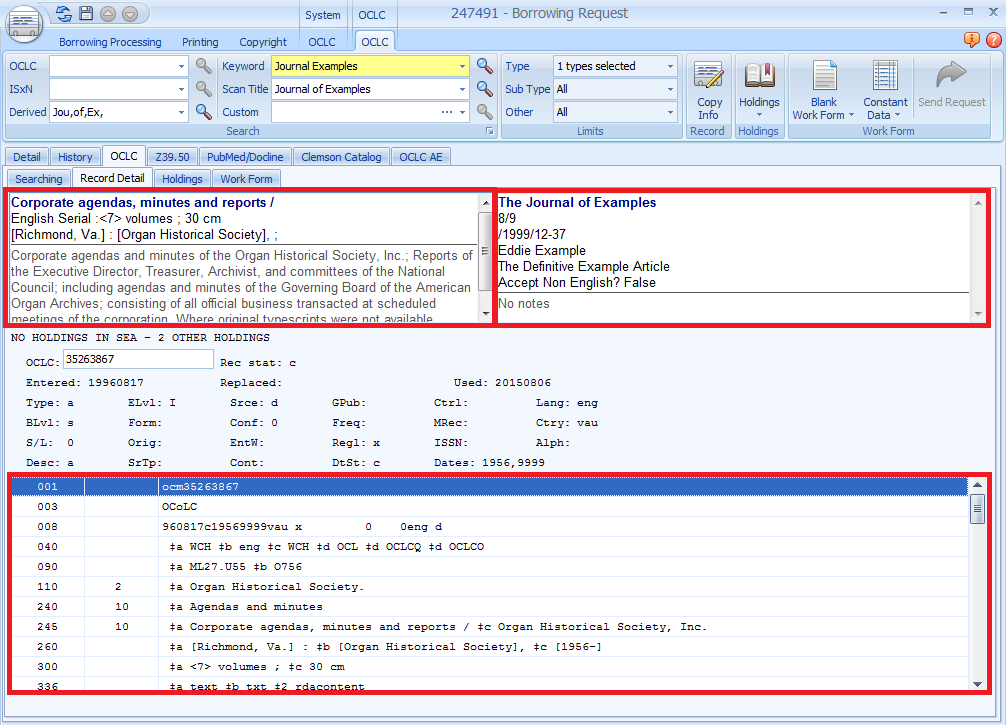
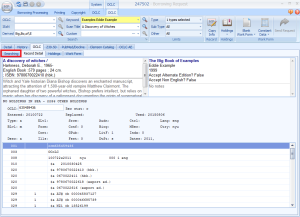
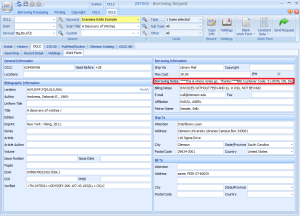
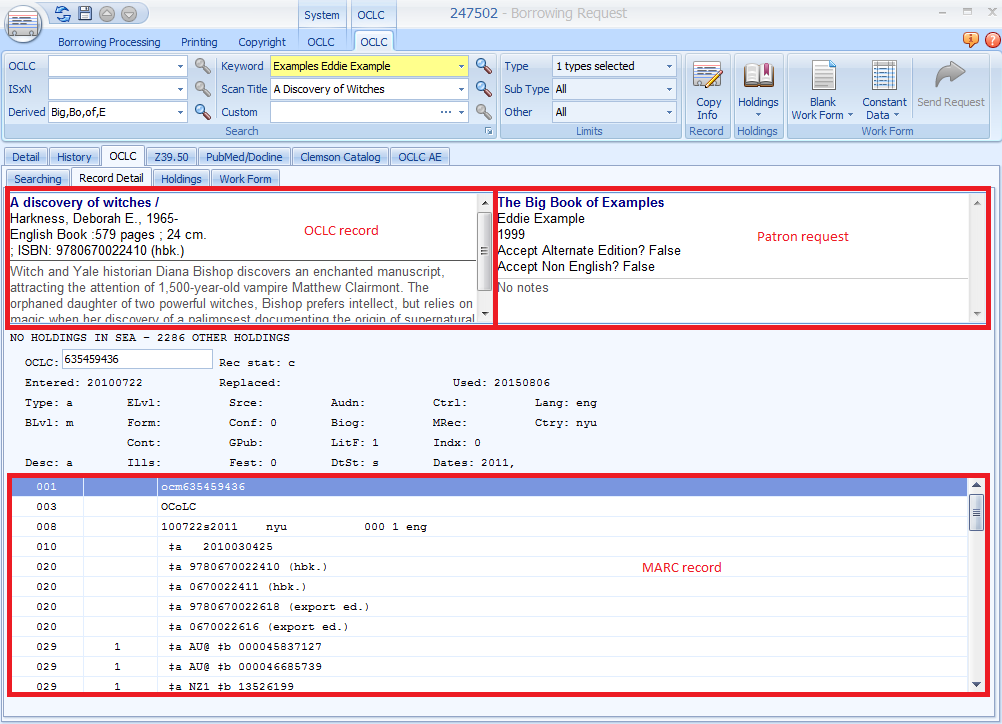
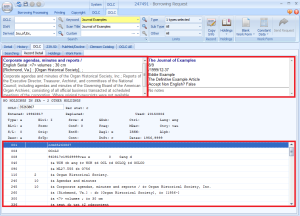
- When you locate a record that looks correct, double click to open it.
- In the record detail area, the box on the left will show the OCLC record, and the box on the right will show the patron request. Compare the information in these two boxes to ensure the item is the same as what is being requested. If you need to, scan the MARC record on the bottom half of the screen to verify the item.
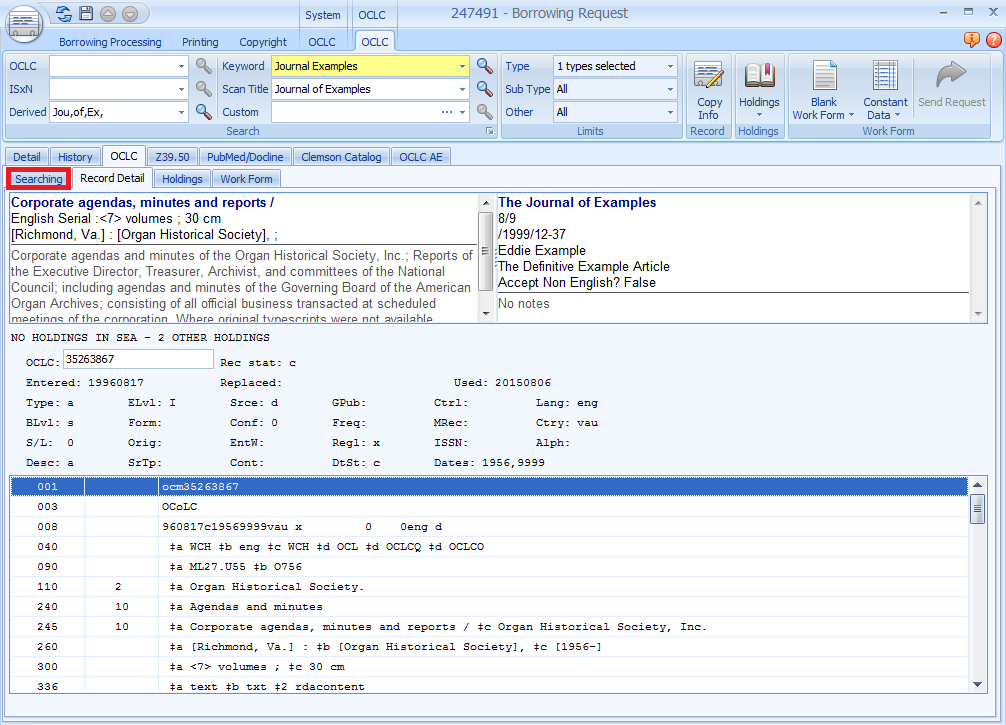
- If the items do not match, click the “Searching” tab. Then run your search again.
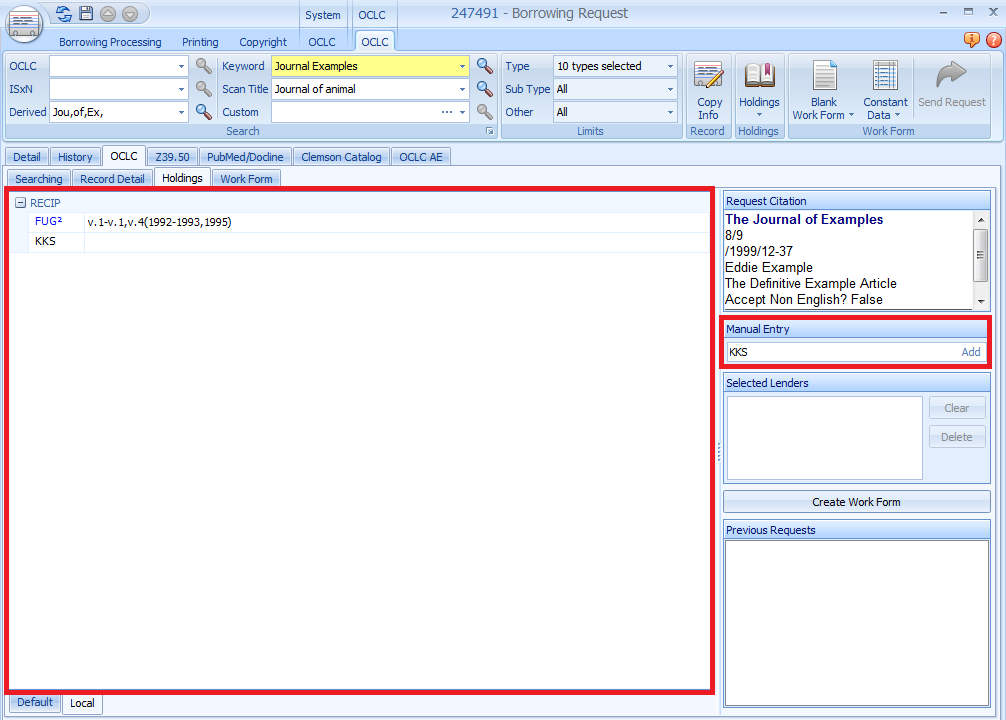
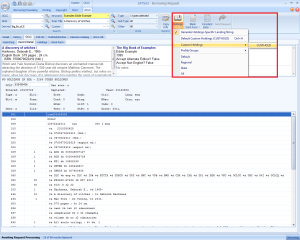
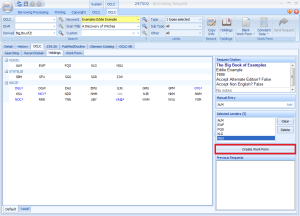
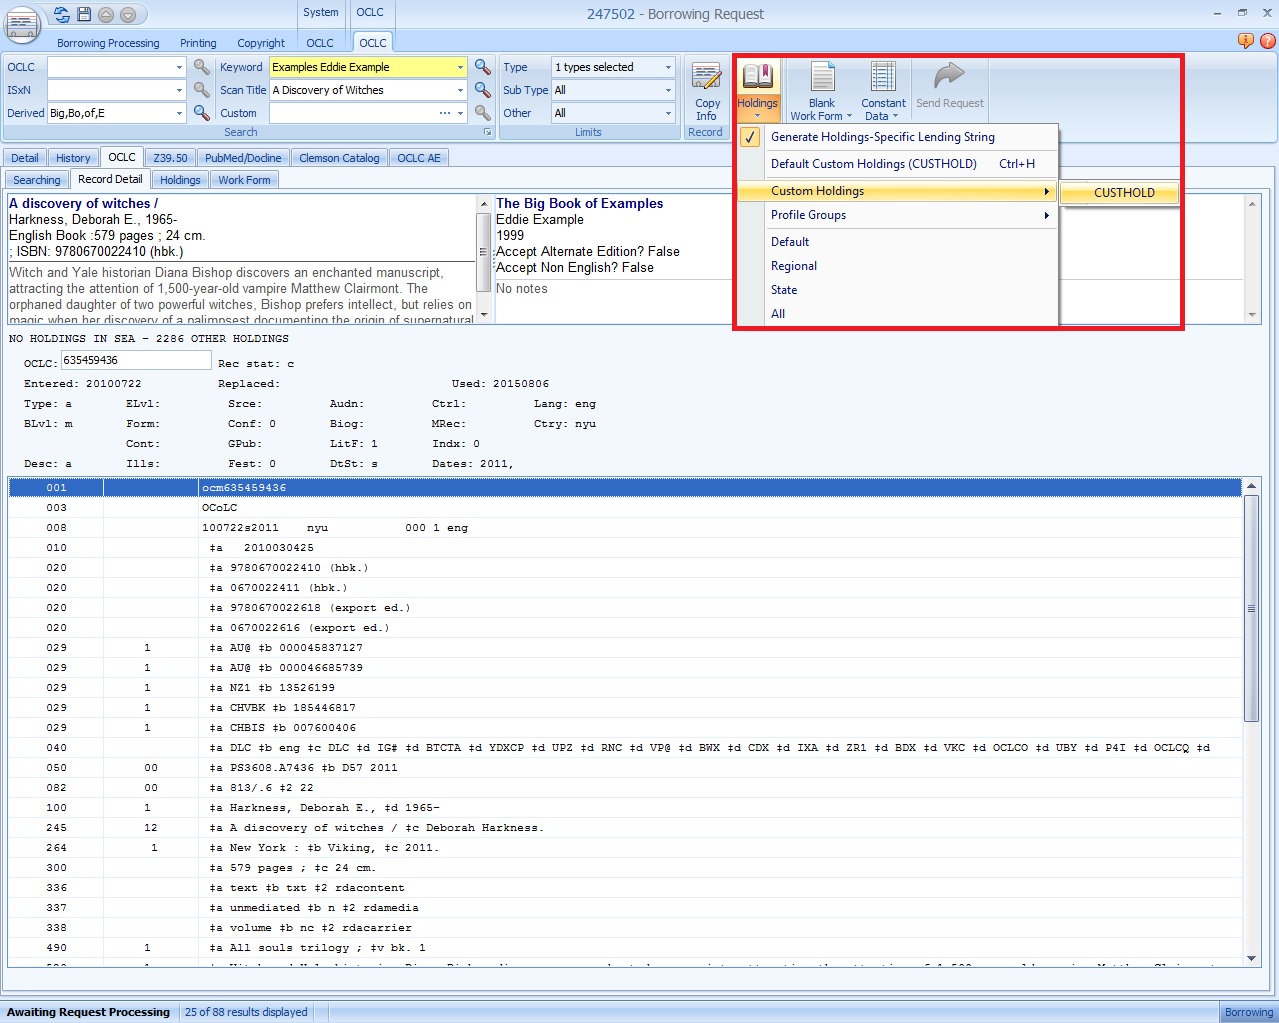
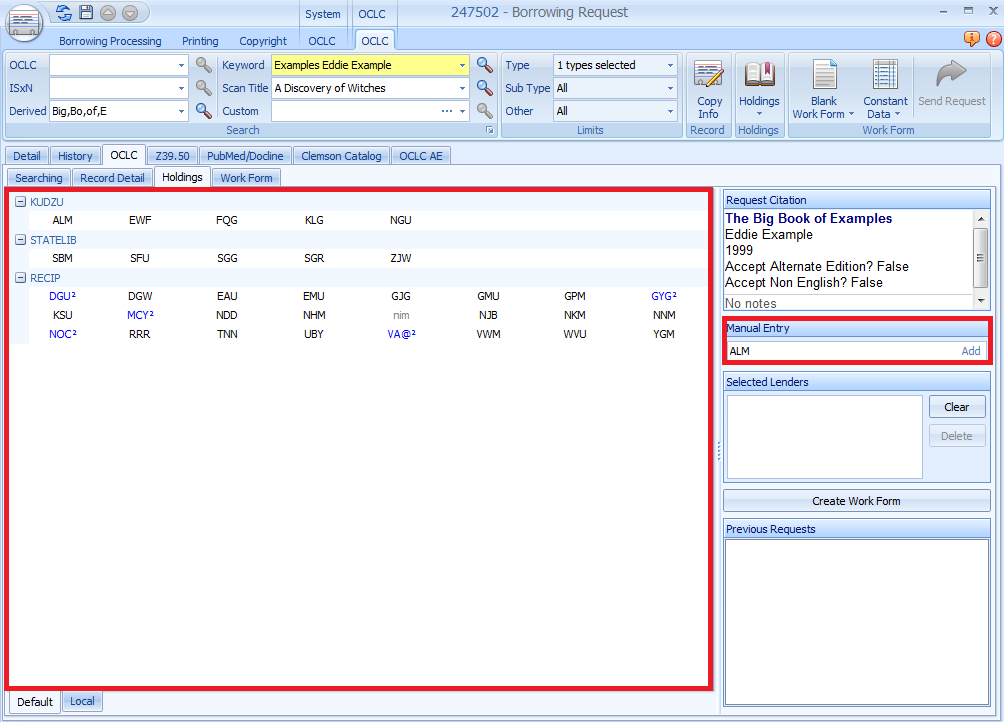
- If the items are a match, click the “Holdings” button, and select “Custom Holds” from the drop down menu. Then click “CUSTHOLD” as your group.
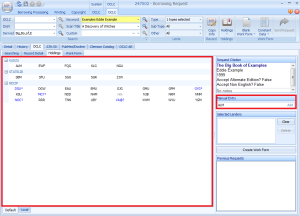
- Select lenders from the panel on the left by double clicking the OCLC symbol or by typing the symbol into the manual entry box and pressing enter.
- When choosing lender, first select those within the Kudzu group, then those from the state library group, then the remaining reciprocal libraries.
- If an OCLC symbol appears in blue with a superscript 2 after it, the symbol must be entered twice in a row. If the symbol appears in red with a superscript 3 after it, the symbol must be entered three times. If the symbol appears in red with an asterisk after it, the symbol must be the only symbol in the lend string and must be input five times.
- When choosing lender, first select those within the Kudzu group, then those from the state library group, then the remaining reciprocal libraries.
- Select at least five lenders, but no more than fifteen.
- If you run out of libraries in the CUSTHOLD holding group, click the “Holdings” button, and select “Regional” from the drop down menu. Repeat this, selecting “State,” then “All” until there are enough lenders in the string. Be sure not to repeat lenders once they have already been input in the lending string.
- Once your lending string is complete, click the “Create Work Form” button.
- Check the work form to be sure all necessary information is there. If you need to include a special message, add the message to the front of the borrowing notes field in the following format: ***note. Thanks!***
- Click the “Send Request” button to send the work form.

- In the request, click the “Request Sent” button to route the request to this queue in ILLiad.


Articles
- In the library catalog check to see if we own the journal in the request.
- If we own the title electronically, navigate down to the article level. If we have access to the PDF of the article, save the PDF in the C:illiad/images folder as the transaction number of the request.
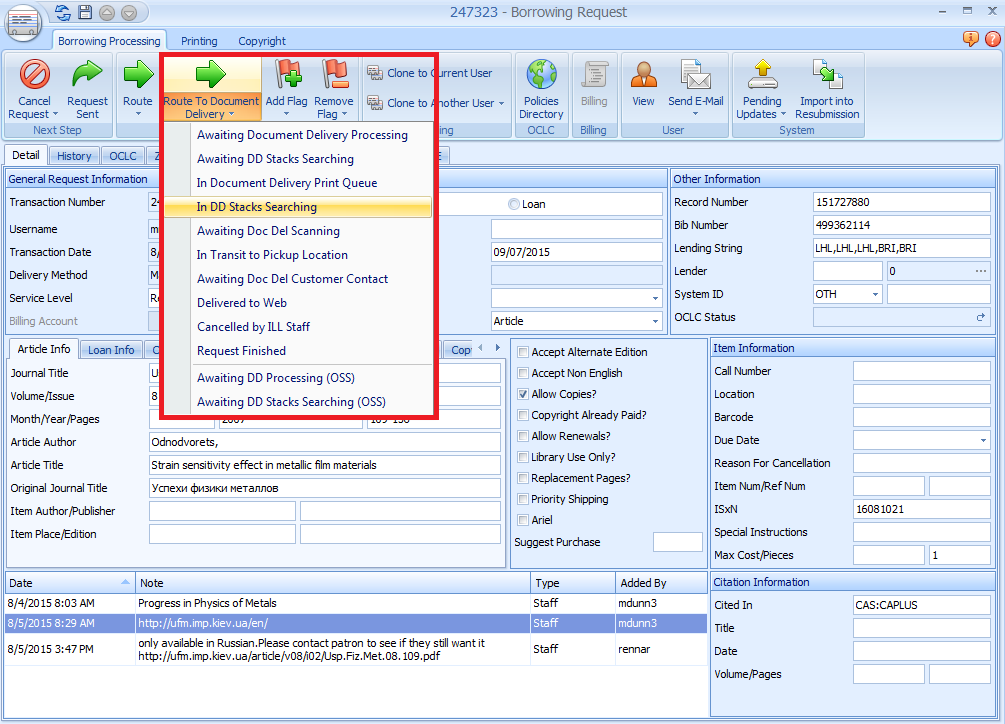
- Click “Route to Document Delivery” and select “In DD Stacks Searching” from the drop down menu.

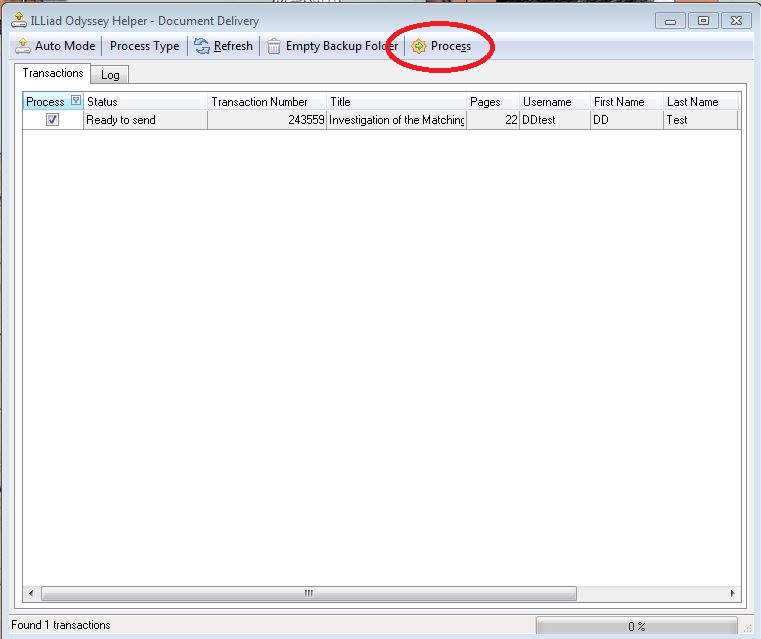
- Open Odyssey Helper.
- Make sure “Process Type” is set to “Document Delivery.”
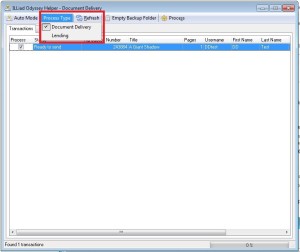
- Click the refresh button to be sure all requests are found.
- Click “Process” to send the item.

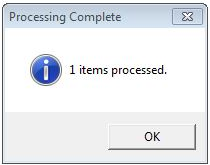
- Click “OK” on the pop up that appears.
- Click “Route to Document Delivery” and select “In DD Stacks Searching” from the drop down menu.
- If we own the title (at the volume/issue level) in print, put the call number of the item into the call number field of the ILLiad form.
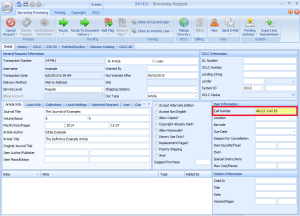
- If the location of the item is a branch location, type the branch location in the “Location” box.
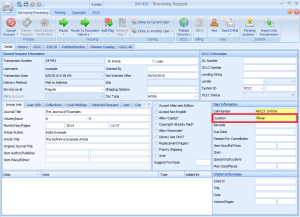 If the item location is Hunter, treat the item as if we do not own it. Collections in Hunter are not organized, and it is timely and difficult to locate the item, if it can be located at all. It is easier to request the item through reciprocal lenders in ILL.
 - Save your changes.
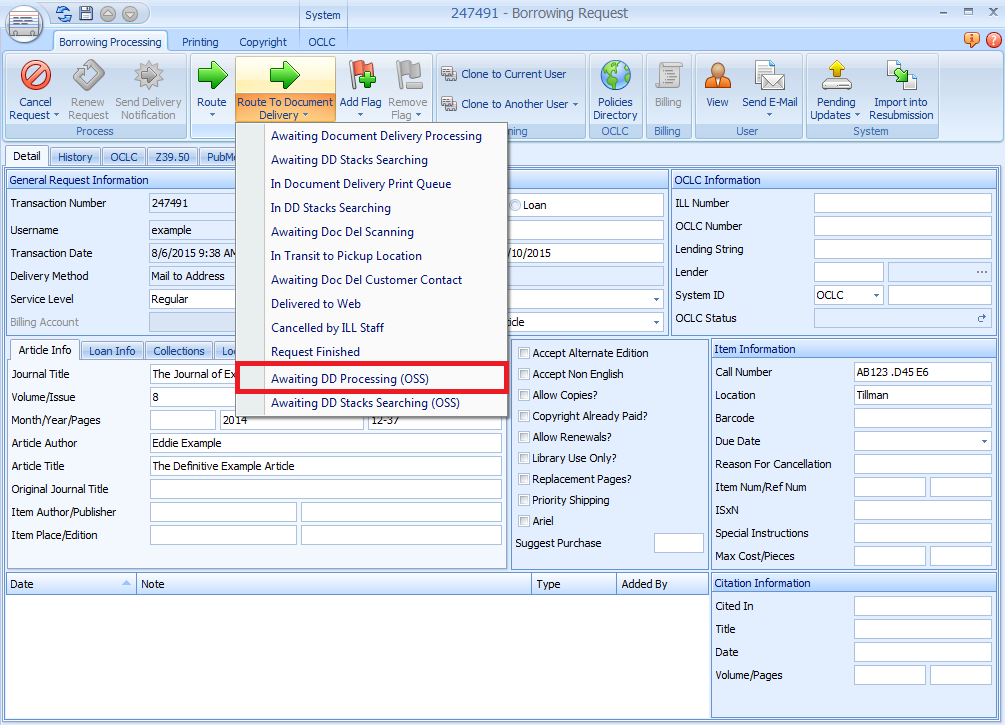
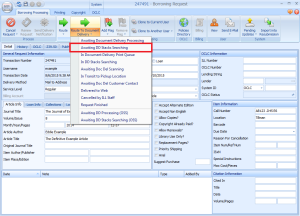
- Click the “Route to Document Delivery” drop down menu.
- If the item is located in the library depot, select “Awaiting DD Processing (OSS).”

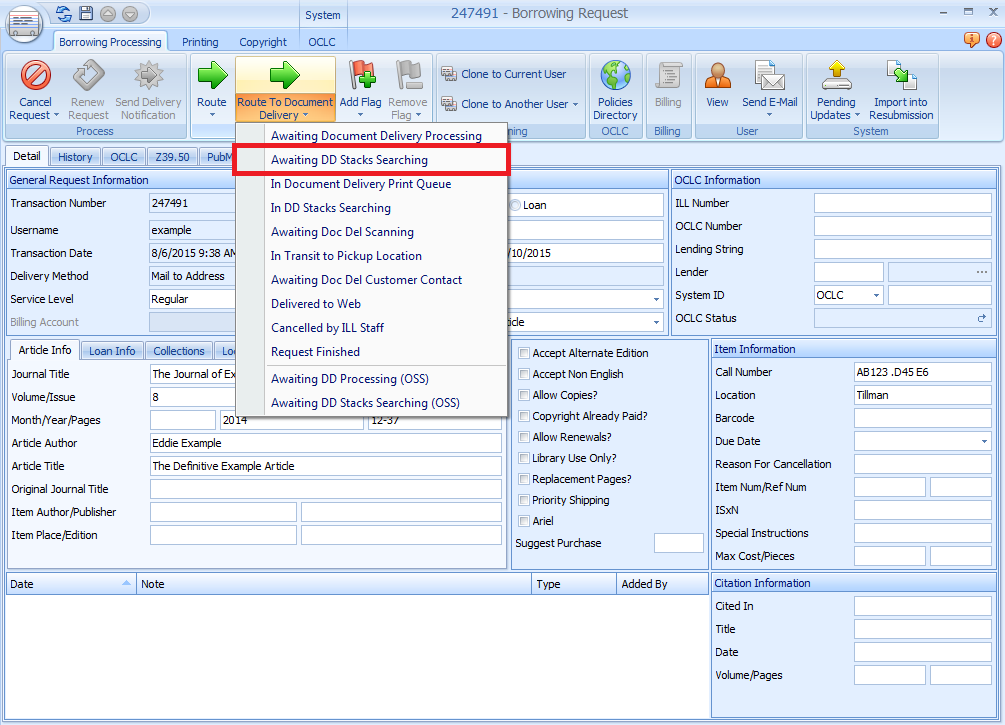
- If the item is located anywhere else, select “Awaiting DD Stacks Searching.”
- If the location of the item is a branch location, type the branch location in the “Location” box.
- If we do not own the item, click to open the OCLC tab.

- Search for the item in OCLC. If you get stuck, see OCLC Search Tips.
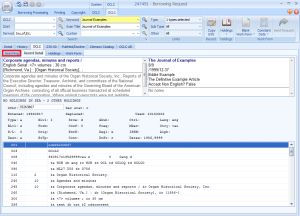
- When you locate a record that looks correct, double click to open it.
- In the record detail area, the box on the left will show the OCLC record, and the box on the right will show the patron request. Compare the information in these two boxes to ensure the item is the same as what is being requested. If you need to, scan the MARC record on the bottom half of the screen to verify the item.
- If the items do not match, click the “Searching” tab, then run your search again.
- If the items are a match, click the “Holdings” button, and select “Custom Holds” from the drop down menu. Then click “CUSTHOLD” as your group.
- Select lenders from the panel on the left by double clicking the OCLC symbol or by typing the symbol into the manual entry box and pressing enter. When the item is a print serial, the volumes/years owned will be next to the lender symbol. Use these holdings to help determine which libraries to select.
- When choosing lenders, first select those within the Kudzu group, then those from the state library group, then the remaining reciprocal libraries.

- If an OCLC symbol appears in blue with a superscript 2 after it, the symbol must be entered twice in a row. If the symbol appears in red with a superscript 3 after it, the symbol must be entered three times in a row. If the symbol appears in red with an asterisk after it, the symbol must be the only symbol in the lender string and must be input five times.
- When choosing lenders, first select those within the Kudzu group, then those from the state library group, then the remaining reciprocal libraries.
- Select at least five lenders, but no more than fifteen.
- If you run out of libraries in the CUSTHOLD holdings group, click the “Holdings” button, and select “Regional” from the drop down menu. Repeat this selecting “State,” then “All” until there are enough lenders in the string. Be sure not to repeat lenders once they have already been input into the lending string.
- Once your lending string is complete, click the “Create Work Form” button.
- Check the work form to be sure all necessary information is there. If you need to include a special message, add the message to the front of the borrowing notes field in the following format: ***note. Thanks!***
- Click the “Send Request” button to send the work form.
- In the request, click the “Request Sent” button to route the request to this queue in ILLiad.